Spring Boot - 将WAR文件部署到外部Tomcat上
在这篇文章中,我们将讨论如何将Spring Boot网络应用程序WAR文件部署到外部Tomcat servlet容器。
配置和部署Spring Web应用war文件到外部Tomcat servlet容器非常简单。
###Spring Boot WAR部署的三个步骤
- 改变包装类型。
<packaging>war</packaging>
- 添加
spring-boot-starter-tomcat作为provided范围
<dependency><groupId>org.springframework.boot</groupId><artifactId>spring-boot-starter-tomcat</artifactId><scope>provided</scope></dependency>
- Spring Boot
Application或Main类扩展SpringBootServletInitializer
import org.springframework.boot.SpringApplication;import org.springframework.boot.autoconfigure.SpringBootApplication;import org.springframework.boot.builder.SpringApplicationBuilder;import org.springframework.boot.web.servlet.support.SpringBootServletInitializer;@SpringBootApplicationpublic class Springboot2WebappJspApplication extends SpringBootServletInitializer{@Overrideprotected SpringApplicationBuilder configure(SpringApplicationBuilder application) {return application.sources(Springboot2WebappJspApplication.class);}public static void main(String[] args) {SpringApplication.run(Springboot2WebappJspApplication.class, args);}}
让我们使用JSP作为View来开发完整的Spring Boot 2 Web应用程序的步骤。
1. 我们将建立什么
我们将构建一个简单的Spring MVC Web应用程序,并将JSP作为视图,我们将把这个应用程序部署在一个外部的servlet容器中,这个容器就是Tomcat。
2. 使用的工具和技术
- Spring Boot - 2.0.4.RELEASE
- JDK - 1.8或更高版本
- Spring Framework - 5.0.8 RELEASE
- Hibernate - 5.2.17.Final
- Maven - 3.2以上
- IDE - Eclipse或Spring Tool Suite (STS)
- Tomcat - 8.5以上
- JSP
- Bootstrap 3+
3. 创建和导入一个项目
有很多方法可以创建Spring Boot应用程序。最简单的方法是使用http://start.spring.io/的Spring Initializr,它是一个在线Spring Boot应用程序生成器。

看上面的图,我们指定了以下细节。
Generate: Maven项目Java Version: 1.8 (默认)Spring Boot:2.0.4Group: net.guards.springboot2Artifact: springboot2webappjspName: springboot2webappjspPackage Name: net.guards.springboot2.springboot2webappjspPackaging: jar (这是默认值)Dependencies: Web, JPA, MySQL, DevTools
一旦,所有的细节被输入,点击生成项目按钮将生成一个spring boot项目并下载。接下来,解压下载的压缩文件并将其导入你最喜欢的IDE。
4. 包装结构

一旦我们将生成的spring boot项目导入IDE,我们将看到一些自动生成的文件。
pom.xmlresourcesSpringboot2WebappJspApplication.javaSpringboot2WebappJspApplicationTests.java
5. pom.xml文件
<?xmlversion="1.0"encoding="UTF-8"?><project xmlns="http://maven.apache.org/POM/4.0.0"xmlns:xsi="http://www.w3.org/2001/XMLSchema-instance"xsi:schemaLocation="http://maven.apache.org/POM/4.0.0 http://maven.apache.org/xsd/maven-4.0.0.xsd"><modelVersion>4.0.0</modelVersion><groupId>net.guides.springboot2</groupId><artifactId>springboot2-webapp-jsp</artifactId><version>0.0.1-SNAPSHOT</version><packaging>war</packaging><name>springboot2-webapp-jsp</name><description>Demo project for Spring Boot</description><parent><groupId>org.springframework.boot</groupId><artifactId>spring-boot-starter-parent</artifactId><version>2.0.4.RELEASE</version><relativePath /> <!-- lookup parent from repository --></parent><properties><project.build.sourceEncoding>UTF-8</project.build.sourceEncoding><project.reporting.outputEncoding>UTF-8</project.reporting.outputEncoding><java.version>1.8</java.version></properties><dependencies><dependency><groupId>org.springframework.boot</groupId><artifactId>spring-boot-starter-web</artifactId></dependency><dependency><groupId>org.springframework.boot</groupId><artifactId>spring-boot-starter-data-jpa</artifactId></dependency><dependency><groupId>org.springframework.boot</groupId><artifactId>spring-boot-devtools</artifactId><scope>runtime</scope></dependency><dependency><groupId>mysql</groupId><artifactId>mysql-connector-java</artifactId><scope>runtime</scope></dependency><dependency><groupId>org.springframework.boot</groupId><artifactId>spring-boot-starter-test</artifactId><scope>test</scope></dependency><!-- JSTL for JSP --><dependency><groupId>javax.servlet</groupId><artifactId>jstl</artifactId></dependency><!-- Need this to compile JSP --><dependency><groupId>org.apache.tomcat.embed</groupId><artifactId>tomcat-embed-jasper</artifactId><scope>provided</scope></dependency><dependency><groupId>org.springframework.boot</groupId><artifactId>spring-boot-starter-tomcat</artifactId><scope>provided</scope></dependency><!-- Optional, test for static content, bootstrap CSS --><dependency><groupId>org.webjars</groupId><artifactId>bootstrap</artifactId><version>3.3.7</version></dependency></dependencies><build><plugins><plugin><groupId>org.springframework.boot</groupId><artifactId>spring-boot-maven-plugin</artifactId></plugin></plugins></build></project>
注意,在pom.xml上面,我们的包装类型是war,tomcat启动器是provided范围。
6. Springboot2WebappJspApplication.java文件
这个类提供了一个带有*public static void main(String[] args)*方法的入口,你可以运行它来启动应用程序。
注意,SpringBootServletInitializer从传统的WAR部署中运行一个SpringApplication
package net.guides.springboot2.springboot2webappjsp;import org.springframework.boot.SpringApplication;import org.springframework.boot.autoconfigure.SpringBootApplication;import org.springframework.boot.builder.SpringApplicationBuilder;import org.springframework.boot.web.servlet.support.SpringBootServletInitializer;@SpringBootApplicationpublic class Springboot2WebappJspApplication extends SpringBootServletInitializer{@Overrideprotected SpringApplicationBuilder configure(SpringApplicationBuilder application) {return application.sources(Springboot2WebappJspApplication.class);}public static void main(String[] args) {SpringApplication.run(Springboot2WebappJspApplication.class, args);}}
7. 创建一个名为User.java的JPA实体
package net.guides.springboot2.springboot2webappjsp.domain;import javax.persistence.Entity;import javax.persistence.GeneratedValue;import javax.persistence.GenerationType;import javax.persistence.Id;import javax.persistence.Table;@Entity@Table(name = "user")public class User {@Id@GeneratedValue(strategy=GenerationType.AUTO)private Integer id;private String name;public User(){}public User(Integer id, String name){this.id = id;this.name = name;}public Integer getId(){return id;}public void setId(Integer id){this.id = id;}public String getName(){return name;}public void setName(String name){this.name = name;}}
8. 创建Spring Data JPA存储库 - UserRepository.java
package net.guides.springboot2.springboot2webappjsp.repositories;import org.springframework.data.jpa.repository.JpaRepository;import net.guides.springboot2.springboot2webappjsp.domain.User;public interface UserRepository extends JpaRepository<User, Integer>{}
9. 创建Spring控制器 - UserController.java
package net.guides.springboot2.springboot2webappjsp.controllers;import org.springframework.beans.factory.annotation.Autowired;import org.springframework.stereotype.Controller;import org.springframework.ui.Model;import org.springframework.web.bind.annotation.RequestMapping;import net.guides.springboot2.springboot2webappjsp.repositories.UserRepository;@Controllerpublic class UserController {@AutowiredUserRepository userRepo;@RequestMapping("/users")public String home(Model model) {model.addAttribute("users", userRepo.findAll());return "index";}}
10. 配置MySQL数据库和JSP视图解析器
配置application.properties以连接到你的MySQL数据库。让我们打开一个application.properties文件,并在其中添加以下数据库配置。
spring.mvc.view.prefix: /WEB-INF/jsp/spring.mvc.view.suffix: .jsplogging.level.org.springframework=INFO################### DataSource Configuration ##########################spring.datasource.driver-class-name=com.mysql.jdbc.Driverspring.datasource.url=jdbc:mysql://localhost:3306/users_databasespring.datasource.username=rootspring.datasource.password=root################### Hibernate Configuration ##########################spring.jpa.hibernate.ddl-auto=updatespring.jpa.show-sql=true
11. 插入SQL脚本
一旦你运行这个应用程序,将在数据库中创建users表,并使用下面的插入SQL脚本在users表中填充一些记录。
INSERT INTO `users_database`.`user` (`id`, `name`) VALUES ('1', 'Salman');INSERT INTO `users_database`.`user` (`id`, `name`) VALUES ('2', 'SRK');INSERT INTO `users_database`.`user` (`id`, `name`) VALUES ('3', 'AMIR');INSERT INTO `users_database`.`user` (`id`, `name`) VALUES ('4', 'Tiger');INSERT INTO `users_database`.`user` (`id`, `name`) VALUES ('5', 'Prabhas');
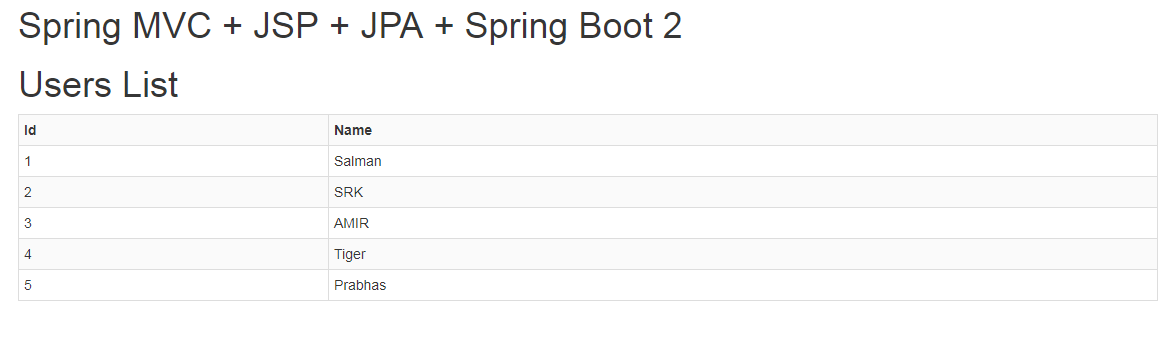
12. 创建一个JSP视图 - users.jsp
让我们创建一个users``.jsp视图来显示用户的列表。在webapp/WEB-INF/jsp文件夹下找到。
<!DOCTYPE html><%@ taglib prefix="spring" uri="http://www.springframework.org/tags"%><%@ taglib prefix="c" uri="http://java.sun.com/jsp/jstl/core"%><html lang="en"><head><link rel="stylesheet" type="text/css"href="webjars/bootstrap/3.3.7/css/bootstrap.min.css" /><c:url value="/css/main.css" var="jstlCss" /><link href="${jstlCss}" rel="stylesheet" /></head><body><div class="container"><header><h1>Spring MVC + JSP + JPA + Spring Boot 2</h1></header><div class="starter-template"><h1>Users List</h1><table class="table table-striped table-hover table-condensed table-bordered"><tr><th>Id</th><th>Name</th></tr><c:forEach var="user" items="${users}"><tr><td>${user.id}</td><td>${user.name}</td></tr></c:forEach></table></div></div><script type="text/javascript"src="webjars/bootstrap/3.3.7/js/bootstrap.min.js"></script></body></html>
13. 运行应用程序
- 这是一个maven项目,所以用以下命令创建一个
war文件。
mvn clean install or mvn clean package
一旦maven构建成功,
WAR文件将在目标文件夹下生成。
将war文件复制到外部tomcat webapps文件夹,然后启动tomcat服务器即可。在浏览器中点击这个链接 - http://localhost:8080/springboot2-webapp-jsp/users
注意,你可以将上下文名称从springboot2-webapp-jsp-0.0.1-SNAPSHOT改为springboot2-webapp-jsp,或者按照你的要求。
GitHub 仓库
本文的源代码可在我的GitHub仓库中找到 - https://github.com/RameshMF/spring-boot-tutorial/tree/master/springboot2-webapp-jsp-WAR在Spring Boot教程中学习完整的Spring Boot。
版权说明 : 本文为转载文章, 版权归原作者所有 版权申明
原文链接 : https://www.javaguides.net/2018/09/spring-boot-deploy-war-file-to-external-tomcat.html
内容来源于网络,如有侵权,请联系作者删除!